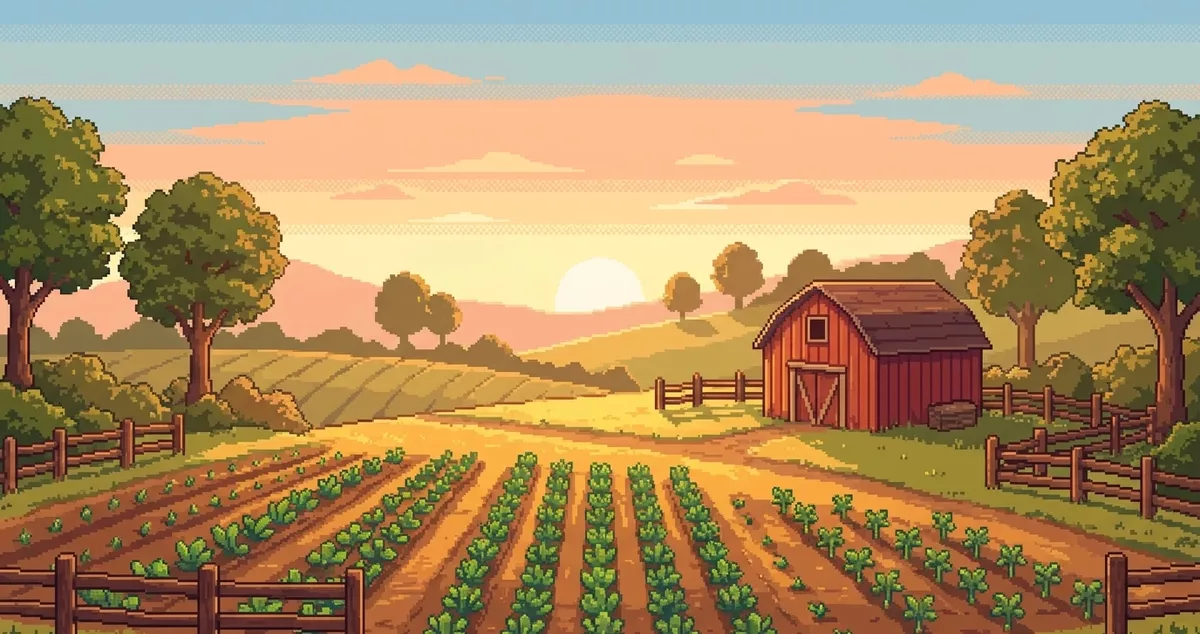
Learning how to stream indie games on Twitch is one of the most approachable ways to start broadcasting. Indie titles are gentle on your hardware, inexpensive to buy, and often live in smaller, less crowded categories where a brand-new channel can actually be found. Whether you love cozy farming sims, atmospheric walking simulators, or branching narrative adventures, you already have the perfect raw material for a stream that feels personal and genuine.
This beginner guide walks you through the entire process, from creating your account to going live for the first time. We will cover hardware, software, scene setup, and the habits that turn a quiet channel into a small community. If you want a wider look at building an audience, our streaming games hub and our roundup of the best games for small streamers pair well with everything below. By the end, you will know exactly how to stream indie games with confidence, even on a tight budget.
Set Up Your Twitch Account
Everything begins with your Twitch account. Setup is free and takes only a few minutes, but a few early choices make your channel look intentional rather than empty.
Head to twitch.tv and sign up with an email address. Pick a username you can live with long-term, since changing it later is limited and can confuse returning viewers. Once you are in, your most important first action is security.
Enable Two-Factor Authentication First
Twitch requires two-factor authentication (2FA) before you can stream. Set it up immediately under Settings → Security and Privacy. It protects your channel from takeovers and unlocks streaming permissions in one step.
With security handled, customize your channel so first-time visitors know who you are. Spend a little time on the basics:
- Profile picture - A simple, recognizable image or logo, even a clean piece of pixel art
- Banner and offline screen - A header image plus a graphic viewers see when you are away
- Channel bio - A sentence or two on what you play and when you go live
- Channel panels - Below your stream, add panels for your schedule, your setup, and your social links
You do not need professional artwork to begin. A tidy, consistent look signals that you take the channel seriously, which encourages new viewers to follow. You can always upgrade your branding as you grow.
It also helps to understand where you are headed. New channels start unaffiliated, then become eligible for the Twitch Affiliate program after meeting a follower and watch-time threshold, which unlocks subscriptions and bits. You do not need to chase those milestones on day one. Knowing they exist simply gives you a goal to grow toward as your community forms. Focus first on streaming consistently, and the eligibility numbers tend to follow.
Gather Hardware Essentials
The good news for indie streamers is that you do not need a powerhouse setup. Indie games rarely demand cutting-edge graphics cards, so a mid-range gaming PC can usually run the game and the stream at the same time without strain. That accessibility is exactly why indie streaming is such a friendly entry point.
Here is what actually matters when you stream indie games as a beginner.
Your Indie Streaming Hardware Checklist
- A mid-range gaming PC - Enough to run the game and encode the stream together; lighter indie titles ask very little
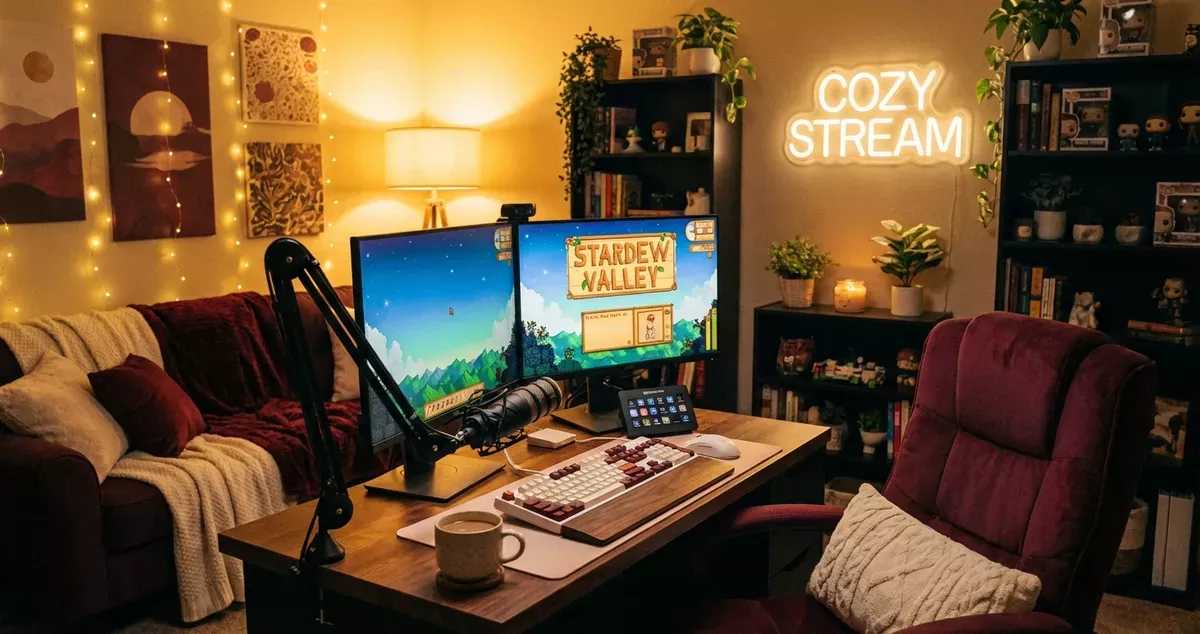
- A quality microphone - The single biggest upgrade for viewer experience; a USB condenser mic is a popular, affordable choice
- A webcam (optional) - Helpful for connection, but plenty of successful narrative streamers stay faceless
- Basic lighting - Only relevant if you use a webcam; a simple desk lamp or ring light improves your picture
- Stable internet - Aim for a reliable upload speed; roughly 4-10 Mbps upload comfortably supports 720p to 1080p streaming
Audio outweighs video for most viewers. People will forgive a webcam-free stream, but harsh or muffled sound drives them away quickly. If you invest in one thing first, make it your microphone.
Your upload speed deserves a quick check too. Streaming sends video out from your connection, so upload matters more than download. Run a speed test, and if your upload is on the lower end, you can simply stream at a lower resolution or bitrate and still look sharp, especially with slower-paced indie games. A wired Ethernet connection is also worth the effort, since it is far more stable than Wi-Fi and prevents the sudden drops that interrupt a live broadcast.
It is worth being honest about why indie games lower the barrier so much. A demanding modern blockbuster can push your hardware to the limit even before you add the overhead of encoding a stream. Cozy farming sims, pixel-art adventures, and dialogue-driven narrative games ask far less, which leaves headroom for your broadcaster software to do its job smoothly. That breathing room means a single mid-range machine can run the game and the stream together, where a graphically intense title might force you toward a more expensive dual-PC setup. Starting with indie titles lets you learn the craft without buying your way in. For a deeper hardware walkthrough, our Twitch streaming setup guide breaks down each component in detail.
Choose and Configure Streaming Software
Streaming software, often called a broadcaster or encoder, captures your game and microphone and sends everything to Twitch. As a beginner, you have three well-supported options, all free.
| Software | Best For | Notes |
|---|---|---|
| OBS Studio | Long-term flexibility | Free, open-source, the industry standard; more settings to learn |
| Twitch Studio | First-time streamers | Made by Twitch with guided setup and built-in templates |
| Streamlabs | Quick visuals | Built-in alerts and overlays, layered on an OBS-style core |
OBS Studio is the free, open-source standard, and learning it now pays off for years. Nearly every overlay, plugin, and tutorial you will find is built with OBS in mind, so the time you spend learning it transfers everywhere. If you want a gentler on-ramp, Twitch Studio offers a guided walkthrough designed for newcomers, with default layouts and alerts already in place so you can be live in minutes. Streamlabs is a third option built on the same underlying technology as OBS, bundling alerts, themes, and a tip system into one package at the cost of a slightly heavier program. There is no wrong pick, and you can migrate your setup later, so choose whatever feels least overwhelming today.
Once your software is installed, configure your output settings. These numbers control how your stream looks and how stable it stays.
Recommended Starting Settings
- Resolution: 720p or 1080p (720p is a safe, sharp starting point)
- Framerate: 30-60 fps (60 fps suits action; 30 fps is plenty for narrative and cozy games)
- Bitrate: roughly 4500-6000 kbps for video, balanced against your upload speed
- Encoder: Hardware encoding (NVENC, AMD, or QuickSync) frees up your CPU for the game; software x264 works if your CPU has headroom
If your stream stutters or drops frames, lower the bitrate or resolution first. A clean, stable 720p stream beats a choppy 1080p one every time. Slower indie games are forgiving here, which is one more reason they are ideal for getting comfortable.
A quick word on encoders, since the choice confuses many beginners. Hardware encoding offloads the heavy lifting to a dedicated part of your graphics card, freeing your processor to run the game. Software encoding uses your CPU, producing slightly sharper results at the same bitrate but demanding more power. For most indie streamers, hardware encoding is the simpler, safer default. Pick it, leave the more advanced tuning options at their presets, and only revisit them once you understand how your stream behaves under real conditions. Tinkering endlessly with settings before you have streamed a single minute is a common trap that delays the part that matters most: actually going live.
Set Up Scenes and Audio
A scene is a saved layout of everything on screen: your game, your camera, your overlays, and your text. Building a couple of simple scenes up front makes your stream look polished and gives you flexibility once you are live.
Start with two scenes and expand later:
- Gameplay scene - Your game capture front and center, with an optional webcam in a corner and a small overlay frame
- Intermission scene - A “Be Right Back” or “Starting Soon” screen for breaks, with text and maybe some music
To capture your game, add a source in your software. Game Capture targets a specific game and is the cleanest option for PC titles, since it hooks directly into the game and ignores everything else on your desktop. If that gives you trouble, Window Capture grabs a single application window, while Display Capture mirrors your entire screen as a last resort. Add your webcam as a separate Video Capture Device source if you are using one. Keep your source list tidy and named clearly, because a cluttered scene becomes hard to manage the moment you want to add overlays or alerts later.
Overlays are the framed borders, labels, and on-screen elements that give a stream its personality. You do not need them to start, and a clean game feed with good audio is perfectly respectable for a first broadcast. When you are ready, free overlay templates are widely available and drop straight into your scenes as image or browser sources. Add them gradually so each new element stays manageable rather than overwhelming your layout all at once.
Audio is where many beginners stumble, so balance it carefully.
Balance Your Audio Before Anything Else
Add your microphone and your game (desktop) audio as separate sources so you can control each independently. Your voice should sit clearly above the game, never buried under it. Watch the audio meters as you talk and play, and aim to keep levels out of the red to avoid distortion.
Before you ever go live, run a private test. Most software lets you record locally or start a test stream so you can review the footage exactly as a viewer would experience it. Play back a few minutes and check three things: your voice is clear and well-balanced, the game is captured smoothly, and nothing private is visible on screen. This quick rehearsal catches the most common first-stream mistakes, such as a muted microphone, a black capture, or a stray notification, all while no one is watching.
One more safeguard is worth the effort. Browser tabs, email pop-ups, and messaging apps can all appear on a full-screen capture, so close anything you would not want broadcast and silence desktop notifications before you start. Many streamers keep a dedicated, clean user profile or a tidy desktop reserved purely for streaming. A few minutes of preparation here prevents the kind of accidental exposure that is impossible to take back once it is live.
Go Live and Engage
Your setup is ready. Now comes the part that actually grows a channel: showing up and connecting with people. The technical work gets you on air, but engagement is what brings viewers back.
Start by choosing the right game. Smaller, less saturated indie categories are easier to surface in than crowded blockbuster directories, where a new channel disappears instantly. Cozy and narrative indies are especially streamer-friendly because their relaxed pace leaves room to talk. Our guides to narrative games for streaming and the best indie games are full of titles worth featuring.
When you go live, set a clear, specific stream title and tags so the right viewers can find you. A title that names the game and hints at the experience, paired with relevant tags, helps Twitch surface your stream to people already searching for that kind of content. Then talk to chat, even when it is empty. Narrating your thoughts and reacting honestly to the game builds the habit and makes the stream feel alive the moment someone arrives.
This last point deserves emphasis, because the silence of an empty chat is what discourages most new streamers. Treating those early streams as practice is the healthiest mindset. Every minute you spend talking through a puzzle, debating a narrative choice aloud, or laughing at a glitch is rehearsal that makes you a better broadcaster. When your first real viewer arrives and sees an engaged, talkative streamer rather than someone sitting in silence, they are far more likely to stay, chat back, and follow.
Habits That Build an Audience
- Stream on a schedule - Consistency lets viewers plan to join you
- Talk to chat by name - Greet every viewer and respond to comments quickly
- React genuinely - Real emotion during a story beat beats forced energy
- Be patient - Small numbers at the start are completely normal; community grows slowly
Never Buy Viewers or Bots
Avoid any service that sells views, followers, or bot traffic. It violates Twitch’s Terms of Service, can get your channel suspended, and inflates numbers without building a real community. Authentic growth from genuine engagement is the only approach that lasts.
Community grows beyond the stream itself, too. Becoming a regular in other small indie streamers’ chats, sharing clips on social media, and joining game-specific Discord servers all introduce you to people who already enjoy the kind of content you make. Indie game communities tend to be tight-knit and welcoming, which works in your favor. Genuine participation, not self-promotion, is what earns you a place in them and brings curious viewers back to your channel.
As you stream more, pay attention to what works. Which games hold attention? When does chat get most active? You can track your streaming performance with analytics that surface these patterns over time, helping you program more of the sessions your audience actually loves. Over weeks and months, those small insights compound into a schedule and a game lineup that consistently resonate with your community.
Frequently Asked Questions
Do I need an expensive PC to stream indie games?
No. Indie games are far less demanding than big-budget titles, so a modest mid-range gaming PC handles both the game and the stream comfortably. Many cozy and narrative indies run smoothly on hardware that would struggle with the latest blockbusters, which makes indie streaming one of the most accessible ways to start.
Which streaming software should a beginner use?
OBS Studio is the free, open-source standard and a safe long-term choice. Twitch Studio is a simpler, Twitch-made option with guided setup that suits first-time streamers. Streamlabs sits in between with built-in alerts and overlays. Start with whichever feels least intimidating, since you can always migrate later.
What bitrate and resolution should I stream at?
Most beginners do well at 720p or 1080p, 30 to 60 frames per second, with a video bitrate between roughly 4500 and 6000 kbps. Slower-paced indie and narrative games look great at 720p60 or 1080p30, which keeps your stream stable even on a modest upload connection.
How do I get viewers on a brand-new channel?
Pick smaller, less saturated indie game categories so your stream is easier to find, stream on a consistent schedule, and talk to chat as if people are watching from day one. Genuine reactions, narrative discussion, and a welcoming community grow far faster than chasing trends. Never buy viewers or bots, which violates Twitch’s rules and harms your channel.
Are indie games good for new streamers?
Yes. Indie games are lighter on hardware, cheaper to buy, and often have smaller, more discoverable categories than major releases. Narrative and cozy indies also create natural conversation, giving you something to talk about with chat even when your audience is small, which is ideal while you find your voice.
Start Streaming Indie Games Today
You now have the full roadmap for how to stream indie games on Twitch, from your first account setup to your first live broadcast. The barrier to entry is genuinely low: a modest PC, a decent microphone, free software, and a game you love are enough to begin. The rest is showing up consistently and connecting with the people who find you.
Keep Building Your Stream
Ready for the next step? Our streaming games hub digs deeper into growing an audience around the games you love, and the best games for small streamers guide helps you pick discoverable titles. Once you are live, you can track your streaming performance with analytics that reveal which sessions resonate most. Start small, stay genuine, and let your community grow one viewer at a time.